
Building your own computer is an exciting way to get a system that matches your needs, budget, and personal preferences. Whether you want a powerful gaming computer, a workstation for video editing, or a simple PC for everyday tasks, a custom PC build gives you more control over the final result.
Instead of purchasing a prebuilt computer, you can select each component separately and create a machine that offers the performance you need. You can also upgrade individual parts in the future without replacing the entire system.
In this guide, we will explain how to build a custom PC, which components you need, how to choose the right hardware, and what mistakes you should avoid.
What Is a Custom PC Build?
A custom PC build means assembling a computer using separately selected hardware components. You choose the processor, graphics card, motherboard, RAM, storage, power supply, and other parts according to your requirements.
For example, a gamer may choose a powerful graphics card and a high-refresh-rate monitor, while a content creator may focus on a strong processor, more RAM, and fast storage.
The biggest advantage is flexibility. You do not have to pay for unnecessary features or settle for hardware that does not meet your needs.
Why Should You Build a Custom PC?
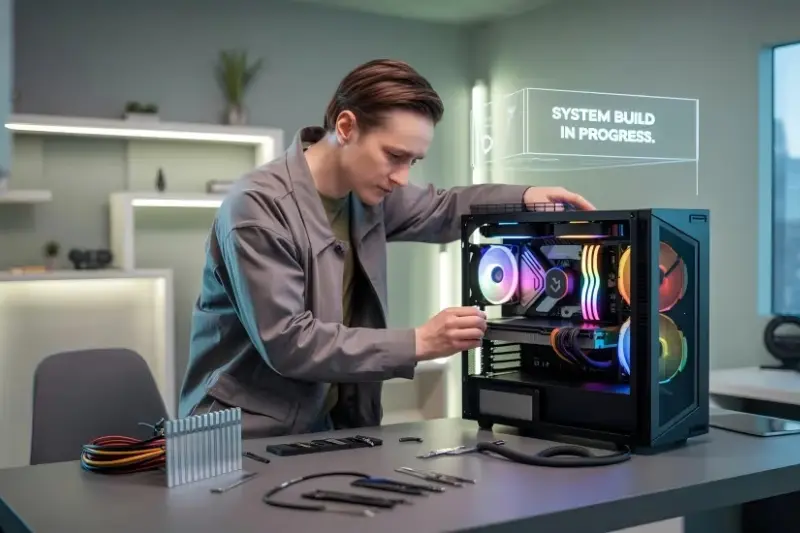
There are several reasons why people prefer building their own computers.
1. Better Control Over Your Budget
When building a computer, you can decide how much money to spend on each component. You can invest more in important parts and save money on features you do not need.
2. Improved Performance
A custom system allows you to select hardware that works well for your specific tasks. You can build a powerful gaming PC, an editing workstation, or a balanced computer for everyday use.
3. Easy Future Upgrades
Custom computers are generally easier to upgrade because you can replace individual components when your requirements change.
For example, you can add more RAM, install another SSD, or upgrade your graphics card if your motherboard and power supply support it.
4. Personal Design
You can customize the appearance of your computer with different case designs, RGB lighting, cooling systems, and cable arrangements.
5. Better Understanding of Computer Hardware
Building your own PC teaches you how different components work together. This knowledge can help you troubleshoot problems and make better hardware decisions.
You may also like it”
PC Build Guide: Parts, Tools, and Step-by-Step Setup
Gaming PC Build: Complete Guide for Beginners
Budget PC Build: Best Affordable Parts and Guide
Essential Components for a Custom PC Build
Before purchasing anything, you should understand the main components required to assemble a computer.
1. Processor (CPU)
<escape></escape>
The Central Processing Unit (CPU) is often called the brain of a computer. It handles instructions, calculations, and many important tasks.
Popular processor families include:
- Intel Core processors
- AMD Ryzen processors
Choose a CPU according to your workload. A basic computer does not need an expensive processor, while gaming, programming, and video editing may require more processing power.
2. Motherboard
The motherboard connects all the computer components and allows them to communicate with each other.
When selecting a motherboard, check:
- CPU socket compatibility
- Supported RAM type
- Number of storage slots
- USB and expansion ports
- Available upgrade options
Always make sure your motherboard supports your chosen processor.
3. Random Access Memory (RAM)
RAM temporarily stores data that your computer needs while running applications.
For most modern desktop systems, 16GB is a practical starting point. However, 32GB or more may be useful for demanding games, professional editing, and multitasking.
Also, check whether your motherboard supports DDR4 or DDR5 memory before purchasing RAM.
4. Graphics Card (GPU)
The graphics processing unit handles visual processing and is especially important for gaming, 3D design, and video editing.
Popular graphics card options include NVIDIA GeForce and AMD Radeon models.
If you only need a computer for browsing, writing, and office applications, integrated graphics may be enough. However, demanding games and creative applications often benefit from a dedicated graphics card.
5. Storage (SSD or HDD)
Storage keeps your operating system, software, documents, games, and other files.
There are two common options:
- SSD: Offers faster loading times and better overall system responsiveness.
- HDD: Provides more storage space at a lower cost, but is slower than an SSD.
A 1TB SSD is a useful starting point for many users.
6. Power Supply Unit (PSU)
The power supply provides electricity to all the computer components.
Choose a reliable PSU with enough wattage for your CPU and graphics card. Check the manufacturer’s recommended power requirements and leave some room for future upgrades.
Do not compromise on power supply quality just to save money.
7. PC Case
The computer case holds and protects the internal components.
Cases come in different sizes, including:
- Full tower
- Mid tower
- Mini tower
- Small form factor
Make sure your case supports your motherboard size, graphics card length, cooling system, and airflow requirements.
8. CPU Cooler
A CPU cooler prevents the processor from overheating.
Depending on your processor and workload, you can choose an air cooler or liquid cooling system. Some processors also include a stock cooler.
Check cooler compatibility and available case space before buying one.
9. Monitor, Keyboard, and Mouse
These are external components that allow you to interact with your computer.
Choose a monitor according to your needs. Gamers may prefer higher refresh rates, while designers may prioritize color accuracy and resolution.
How to Build a Custom PC Step by Step
Once you have selected all the components, you can begin assembling your computer.
Step 1: Prepare Your Workspace
Choose a clean, flat, and well-lit workspace. Keep your components, screwdriver, and other necessary tools nearby.
Avoid working on carpets because static electricity can damage sensitive electronic parts. Handle components carefully and follow the manufacturer’s instructions.
Step 2: Install the CPU
Open the CPU socket on your motherboard and carefully place the processor in the correct position.
Match the alignment markers and avoid touching the delicate socket contacts or CPU pins. Secure the processor according to the motherboard instructions.
Step 3: Install RAM
Find the RAM slots on your motherboard. Open their locking clips and insert the memory sticks into the recommended slots.
Press gently but firmly until the clips lock into place.
Step 4: Install the SSD
If you are using an M.2 SSD, locate the appropriate motherboard slot. Remove the heatsink if necessary, insert the SSD at the correct angle, and secure it with the provided screw.
For a SATA SSD, connect the SATA data cable and power cable later during case installation.
Step 5: Install the CPU Cooler
Follow the cooler manufacturer’s instructions. Depending on the cooler, you may need to apply thermal paste before attaching it.
Make sure the cooler is properly secured and connect its fan cable to the correct motherboard header.
Step 6: Prepare the PC Case
Remove the side panels and check that the motherboard standoffs are installed in the correct positions.
Install the power supply if your case design requires it at this stage. Make sure its fan has access to proper airflow.
Step 7: Install the Motherboard
Carefully place the motherboard inside the case and align it with the standoffs.
Secure it using the appropriate screws. Do not overtighten them.
Step 8: Install the Graphics Card
Find the correct PCIe slot on your motherboard. Remove the required expansion slot covers and insert the graphics card until it locks into place.
Secure the card to the case and connect the required power cables.
Step 9: Connect All Cables
Connect the motherboard power cable, CPU power cable, storage cables, case fans, and front-panel connectors.
Check the motherboard manual because front-panel connectors can be confusing for first-time builders.
Step 10: Start Your Computer
Before closing the case, check all connections and make sure no cables are touching the fans.
Connect your monitor, keyboard, and mouse. Turn on the power supply and press the computer’s power button.
If everything is connected correctly, your computer should start and display the motherboard’s startup screen.
Best Custom PC Build Options for Different Needs
Not everyone needs the same type of computer. Your ideal setup depends on how you plan to use it.
1. Budget PC Build
<escape></escape>
A budget PC is suitable for students, office workers, and people who mainly browse the internet, watch videos, and use basic applications.
Consider these components:
- Entry-level processor with integrated graphics
- Compatible motherboard
- 16GB RAM
- 500GB SSD
- Reliable 450W to 550W power supply, depending on the system
- Affordable case with good airflow
2. Gaming PC Build
A gaming computer needs a balanced processor and graphics card.
Recommended features include:
- Modern AMD Ryzen or Intel Core processor
- Dedicated NVIDIA or AMD graphics card
- 16GB to 32GB RAM
- 1TB SSD
- Quality power supply
- Case with proper airflow
Choose your graphics card according to the games you want to play and your monitor’s resolution.
3. Video Editing PC Build
Video editing requires enough processing power, memory, and storage.
A suitable setup may include:
- Powerful multi-core processor
- Dedicated graphics card
- 32GB RAM or more
- Fast NVMe SSD
- Additional storage for video projects
- Effective CPU cooling
If you regularly edit high-resolution videos, additional RAM and storage can improve your workflow.
4. Professional Workstation Build
A workstation is designed for demanding professional tasks such as 3D rendering, software development, animation, and advanced design.
Depending on your workload, consider a high-performance CPU, powerful GPU, 64GB or more RAM, fast storage, and a reliable cooling solution.
Common Mistakes to Avoid When Building a PC
First-time builders sometimes make mistakes that can cause compatibility issues or unnecessary expenses.
Here are some important things to remember:
- Ignoring compatibility: Make sure your CPU, motherboard, RAM, and other components work together.
- Buying a cheap PSU: Choose a reliable power supply from a trusted manufacturer.
- Spending too much on one component: Maintain a balance between the processor, graphics card, and other hardware.
- Ignoring cooling: Proper airflow helps maintain stable temperatures.
- Choosing insufficient storage: Make sure you have enough space for your operating system, applications, and files.
- Forgetting BIOS support: Some motherboards may need a BIOS update before supporting a particular processor.
- Rushing installation: Read the manuals and check connections before turning on the system.
How Much Does a Custom PC Build Cost?
The cost of a custom computer depends on the hardware you choose, your location, and current market prices.
A basic computer for everyday tasks will generally cost less than a gaming PC or professional workstation.
Your total budget should include:
- Processor
- Motherboard
- RAM
- Graphics card, if required
- Storage
- Power supply
- Case
- Cooling system
- Monitor and accessories
You should also keep some money aside for future upgrades. Before purchasing, compare prices from different sellers and check product warranties.
Is Building Your Own PC Better Than Buying a Prebuilt Computer?
Both options have advantages. The right choice depends on your technical knowledge, budget, and personal preferences.
A custom build gives you greater control over component selection, design, and upgrades. On the other hand, a prebuilt computer saves time because the manufacturer assembles and tests the system for you.
If you enjoy learning about hardware and want complete control over your setup, building your own PC can be a rewarding experience.
However, if you need a computer immediately and do not want to assemble it yourself, a prebuilt system may be more convenient.
Conclusion
A custom PC build gives you the freedom to create a computer that matches your performance requirements, budget, and personal style. You can select each component carefully and build a system for gaming, office work, content creation, or professional applications.
The most important step is planning. Check hardware compatibility, compare prices, choose reliable components, and follow the correct installation process.
With proper research and careful assembly, you can create a computer that serves your needs today and provides room for future upgrades.
Frequently Asked Questions (FAQs)
1. Is building a custom PC difficult?
Building a PC may seem difficult at first, but beginners can complete the process by following instructions and handling components carefully. Understanding basic hardware compatibility is important.
2. What do I need for a custom PC build?
You generally need a processor, motherboard, RAM, storage drive, power supply, case, and CPU cooler. A dedicated graphics card is optional if your processor has suitable integrated graphics.
3. How much RAM is best for a custom PC?
16GB RAM is a good starting point for general use and many gaming setups. However, 32GB or more can be useful for demanding applications, professional editing, and multitasking.
4. Can I build a gaming PC on a budget?
Yes. You can build a budget gaming PC by choosing affordable but compatible components. Focus on getting a suitable graphics card and processor instead of spending too much on unnecessary features.
5. How long does it take to build a custom PC?
A beginner may need two to four hours to assemble a computer, depending on experience and hardware complexity. Installing the operating system and drivers may require additional time.