
Building a gaming PC is an exciting way to enjoy your favorite games with better graphics, smooth performance, and more control over your computer. Whether you want to play competitive games, explore open-world adventures, or stream your gameplay, the right gaming PC build can make a big difference.
However, choosing the right components can feel confusing, especially if you are building your first computer. You need to understand the processor, graphics card, RAM, storage, motherboard, power supply, and cooling system before making a purchase.
This guide explains how to plan a gaming PC build, choose compatible components, manage your budget, and assemble your computer step by step.
What Is a Gaming PC Build?
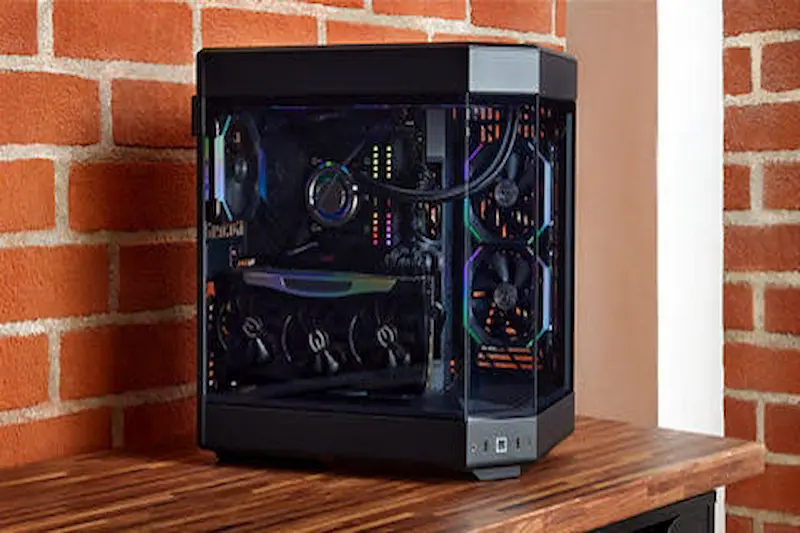
A gaming PC build is the process of selecting and assembling computer components to create a system designed for gaming. Unlike buying a prebuilt computer, building your own PC allows you to choose the hardware according to your needs and budget.
For example, one person may build an affordable computer for games like Minecraft and Valorant, while another may need a powerful system for demanding games at 1440p or 4K resolution.
The best gaming PC build depends on three main factors:
- Budget: How much money you can spend on the complete system.
- Gaming needs: Which games you want to play and at what resolution.
- Future upgrades: Whether you plan to replace or improve components later.
Planning these factors before purchasing hardware can help you avoid unnecessary expenses.
Essential Components for a Gaming PC Build
Every gaming computer needs several components to work properly. Each part has a different role, so choosing balanced hardware is important.
1. Processor (CPU)
The central processing unit, commonly called the CPU, handles calculations and instructions that keep your computer running. It affects gaming performance, multitasking, and other demanding tasks.
Popular processor families include AMD Ryzen and Intel Core.
When choosing a CPU, consider the following:
- The type of games you play.
- Your target resolution and frame rate.
- The performance of your selected graphics card.
- Motherboard compatibility.
- Cooling requirements and power consumption.
You do not always need the most expensive processor. A midrange CPU can be a good choice for many gaming systems when paired with a suitable graphics card.
2. Graphics Card (GPU)
The graphics processing unit, or GPU, is one of the most important components in a gaming PC build. It renders images, textures, lighting, and visual effects.
A stronger graphics card generally makes it easier to play demanding games at higher resolutions and graphics settings.
When selecting a GPU, consider:
- 1080p gaming: Suitable for many budget and midrange systems.
- 1440p gaming: Often benefits from a stronger graphics card with more memory.
- 4K gaming: Usually requires significantly more graphics performance.
- Video editing and streaming: Some GPUs offer useful hardware acceleration features.
- VRAM: The amount of graphics memory can affect performance in games with detailed textures.
NVIDIA GeForce RTX and AMD Radeon RX are two major graphics card families. Compare actual gaming benchmarks, power requirements, and prices before choosing a model.
3. RAM (Memory)
RAM temporarily stores information that your computer needs while running applications and games.
For most modern gaming PC builds, 16GB of RAM is a practical starting point, while 32GB is a good choice for demanding games, multitasking, and streaming.
Consider these points when purchasing memory:
- Check whether your motherboard supports DDR4 or DDR5.
- Choose a compatible memory kit.
- Use two memory modules when appropriate to enable dual-channel operation.
- Check the motherboard’s supported memory speeds.
- Make sure the memory fits comfortably with your CPU cooler.
For example, a 2 × 16GB kit provides 32GB of RAM and is a common option for a modern gaming system.
4. Storage: SSD or HDD
Storage holds your operating system, games, applications, and personal files.
A solid-state drive (SSD) is generally the better choice for a gaming PC because it offers faster loading times than a traditional hard disk drive (HDD).
Here are common storage options:
- 500GB SSD: Suitable for a basic system with a limited number of installed games.
- 1TB SSD: A practical starting point for many gamers.
- 2TB SSD: Useful for people who install several large games.
- HDD: Can provide affordable extra storage for files, recordings, and backups.
An NVMe SSD is a popular choice because it connects through an M.2 slot and can deliver high transfer speeds. However, gaming performance does not always improve significantly when moving from a good SSD to a much faster one.
5. Motherboard
The motherboard connects the processor, memory, storage, graphics card, and other components.
Choosing a motherboard requires careful attention because not every processor works with every board.
Check the following before buying:
- CPU socket compatibility.
- Supported chipset and processor generation.
- DDR4 or DDR5 memory support.
- Available M.2 storage slots.
- PCIe expansion slots.
- USB and networking connections.
- BIOS compatibility.
- Physical size and case support.
A motherboard with useful features and reliable power delivery is often a better investment than an expensive model with features you will never use.
6. Power Supply Unit (PSU)
The power supply converts electricity from the wall into the power required by your computer components.
A poor-quality PSU can cause stability problems and may damage hardware. Therefore, choosing a reliable unit is essential.
Before buying a PSU, check:
- The combined power requirements of your CPU and GPU.
- Recommended wattage from the graphics card manufacturer.
- The quality and reputation of the power supply.
- Required GPU power connectors.
- Whether the unit fits your computer case.
- Its efficiency certification, such as 80 PLUS, where applicable.
A quality 650W PSU may be sufficient for some midrange systems, but more powerful graphics cards may require 750W, 850W, or another rating. Always check the requirements of your exact components rather than selecting wattage based on a general rule.
7. PC Case
The case houses your components and helps protect them from physical damage. It also affects airflow, cooling, cable management, and the appearance of your computer.
When choosing a case, look for:
- Support for your motherboard size.
- Enough space for your graphics card.
- CPU cooler height clearance.
- Proper airflow and ventilation.
- Support for your chosen fans or radiators.
- Convenient front USB and audio ports.
- Enough room for cable management.
A case with a mesh front panel and good fan placement can help keep temperatures under control.
8. CPU Cooler and Case Fans
Your processor needs adequate cooling to maintain stable performance. Some processors include a stock cooler, while others may require a separately purchased cooler.
Common cooling options include air coolers and all-in-one liquid coolers.
Air coolers are often affordable, simple to maintain, and suitable for many gaming systems. Liquid coolers may be useful for particular high-performance builds or aesthetic preferences, but they are not necessary for every computer.
You should also consider case fans. A balanced airflow arrangement helps bring cool air into the case and move warm air out.
Best Gaming PC Build Options for Different Budgets
Your budget determines which components you can afford. The following examples provide general build directions rather than fixed shopping lists. Actual prices and performance depend on your location, component availability, and the games you play.
Budget Gaming PC Build
A budget gaming PC build focuses on delivering useful performance without spending too much money.
A suitable component plan may include:
- A capable entry-level or affordable midrange CPU.
- An entry-level dedicated GPU or a processor with integrated graphics.
- 16GB of compatible RAM.
- A 500GB or 1TB SSD.
- A compatible budget motherboard.
- A reliable power supply with sufficient capacity.
- An affordable case with reasonable airflow.
This type of build can work well for esports games and less demanding titles. If your budget is very limited, starting with integrated graphics and adding a dedicated GPU later may be an option.
However, integrated graphics will not deliver the same performance as a dedicated graphics card in demanding games.
Midrange Gaming PC Build
A midrange system is a strong option for gamers who want a balance between price and performance.
Consider these components:
- A modern six-core or similarly capable CPU.
- A dedicated graphics card suited to your target resolution.
- 32GB of RAM, or 16GB if your budget requires it.
- A 1TB NVMe SSD.
- A motherboard with the features you need.
- A quality PSU with suitable power connectors.
- A case with good airflow.
- An appropriate CPU cooler.
This type of gaming PC can be suitable for 1080p gaming at high settings and, depending on the graphics card, many 1440p gaming situations.
High-End Gaming PC Build
A high-end gaming PC build is designed for demanding games, high refresh rates, detailed graphics, and potentially 4K gaming.
A typical component plan includes:
- A high-performance gaming CPU.
- A powerful graphics card with sufficient VRAM.
- 32GB or more of RAM, depending on your workload.
- A 2TB or larger SSD.
- A motherboard with strong connectivity and suitable expansion options.
- A high-quality PSU sized for the chosen hardware.
- Advanced air cooling or liquid cooling where appropriate.
- A spacious case with excellent airflow.
High-end components can be expensive, so compare performance benchmarks before spending more. A costly GPU may not provide enough additional performance to justify its price for your particular games or monitor.
How to Build a Gaming PC Step by Step
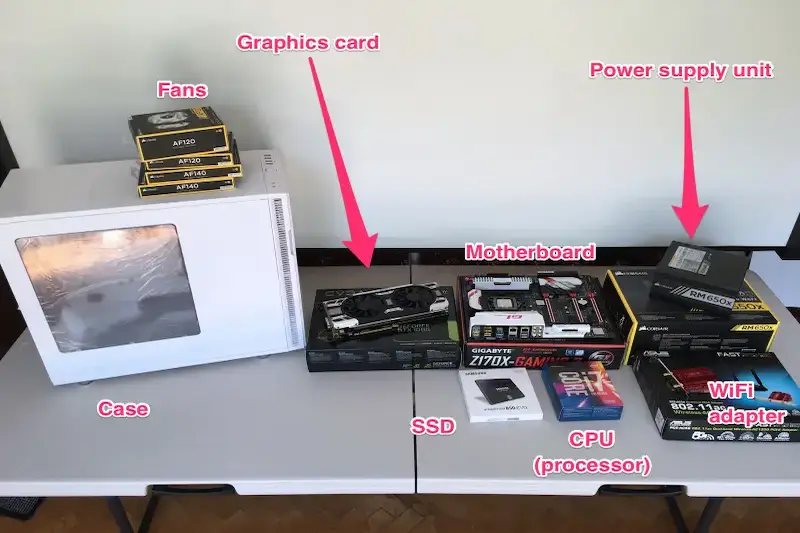
After purchasing compatible components, you can assemble your computer by following a careful process.
Step 1: Prepare Your Workspace
Work on a clean, dry, well-lit surface. Keep a suitable screwdriver nearby and organise the screws and accessories that come with your components.
Avoid working on carpet when possible, and take precautions against static electricity. Handle components by their edges and follow the manufacturers’ safety instructions.
Step 2: Install the CPU
Place the motherboard on its box or another suitable nonconductive surface.
Open the CPU socket according to the motherboard instructions. Align the processor with the marked corner and gently place it into the socket. Do not force it into position.
Secure the socket mechanism as instructed.
Step 3: Install the RAM
Locate the recommended memory slots in your motherboard manual. Open the slot clips where required, align the notch in each memory module, and press until it is properly seated.
If you use two modules, follow the motherboard manual for the correct slots.
Step 4: Install the SSD
Locate the compatible M.2 slot and remove its heatsink if necessary. Insert the SSD at the recommended angle, secure it with the appropriate fastener, and reinstall the heatsink.
Avoid touching the exposed contacts and follow the instructions provided with your motherboard.
Step 5: Install the CPU Cooler
Follow the cooler manufacturer’s installation instructions. If thermal paste is not already applied, use an appropriate amount as recommended.
Connect the cooler to the correct CPU fan or pump header on the motherboard.
Step 6: Prepare the Case
Remove the side panels and check that the motherboard standoffs match the board’s mounting holes.
Install any required I/O shield if it is not integrated into the motherboard. Check the case manual before mounting the motherboard.
Step 7: Install the Motherboard
Carefully place the motherboard inside the case and align it with the standoffs. Secure it using the appropriate screws without overtightening them.
Step 8: Install the Power Supply
Position the PSU according to the case’s design and ventilation requirements. Secure it with the supplied screws.
Route the required power cables for the motherboard, CPU, graphics card, and storage devices.
Important: Never use modular PSU cables from a different power supply unless the manufacturer explicitly confirms they are compatible. Cables that physically fit can have different wiring and may damage components.
Step 9: Install the Graphics Card
Identify the appropriate PCIe slot and remove the required expansion-slot covers from the case.
Insert the graphics card until it is securely seated. Fasten it to the case and connect the power cables required by the card.
Large graphics cards may need additional support to prevent sagging.
Step 10: Connect the Remaining Cables
Connect the motherboard power cable, CPU power cable, case fans, front-panel connectors, USB ports, and other required connections.
Use the motherboard manual to identify each header correctly. Double-check the connections before powering on the system.
Step 11: Start the Computer
Connect your monitor, keyboard, and mouse. Plug the computer into a suitable power outlet and turn it on.
If everything is connected correctly, the computer should start and display the motherboard’s startup screen or BIOS interface.
If it does not start, switch off the power and check the connections. Avoid repeatedly powering on a system that shows signs of an electrical problem.
Step 12: Install the Operating System and Drivers
After confirming that the hardware works, install a supported operating system.
Next, install the appropriate motherboard chipset drivers, graphics drivers, networking drivers, and other necessary software.
Check the BIOS for memory settings and system temperatures. Update the BIOS only when needed, using the motherboard manufacturer’s instructions and a stable power supply.
Common Gaming PC Build Mistakes to Avoid
Even a carefully planned computer can have problems if you overlook compatibility or installation details.
Buying an Expensive CPU but a Weak GPU
Many games depend heavily on graphics performance. Spending too much on the processor while choosing an underpowered graphics card may create an unbalanced system.
Choose your CPU and GPU together based on your target resolution and games.
Ignoring Component Compatibility
A processor may not fit a particular motherboard, and DDR5 memory cannot be installed in a DDR4-only motherboard.
Check the official specifications of every major component before purchasing it.
Choosing a Low-Quality Power Supply
A cheap, poorly designed PSU can create stability and safety risks. Choose a reputable model with suitable capacity and the correct connectors.
Forgetting Monitor Costs
Your gaming experience also depends on your monitor. A powerful computer may be wasted on a display that cannot take advantage of its performance.
Include the monitor, keyboard, mouse, headset, and other necessary accessories in your overall budget.
Ignoring Cooling and Airflow
High temperatures can cause components to reduce their performance. Select a case with adequate ventilation and arrange fans to support sensible airflow.
Spending Too Much on RGB Lighting
RGB lighting can make your computer look attractive, but it does not automatically improve gaming performance.
If your budget is limited, spend more on components that directly affect your gaming experience.
How to Improve Gaming PC Performance
After building your computer, a few simple steps can help you get better results.
- Install the latest stable drivers for your graphics card.
- Keep the operating system and games updated.
- Enable the appropriate memory profile in the BIOS if your hardware supports it.
- Monitor CPU and GPU temperatures during gaming.
- Adjust graphics settings to balance image quality and frame rate.
- Keep enough free storage space for updates and temporary files.
- Clean dust filters and fans regularly.
- Avoid unnecessary background applications while gaming.
You can also use in-game benchmarks to compare performance before and after making changes.
Is Building a Gaming PC Better Than Buying a Prebuilt PC?
Both options have advantages. Building a PC gives you greater control over component selection, while a prebuilt computer can save time and may include a single warranty covering the complete system.
A custom build may offer better value when you compare equivalent components and assemble everything carefully. However, a prebuilt system can be worthwhile when it is competitively priced or includes useful support.
Before choosing either option, compare the exact CPU, GPU, RAM, storage, power supply, cooling system, warranty, and total cost.
Frequently Asked Questions (FAQs)
1. How much does a gaming PC build cost?
The cost depends on your country, component availability, and performance goals. An entry-level system costs less than a high-end computer designed for 4K gaming. Set a budget first, then compare compatible components and local prices.
2. Is 16GB RAM enough for gaming?
Yes, 16GB is still a practical starting point for many games. However, 32GB provides more room for demanding titles, multitasking, streaming, and other applications.
3. Which component is most important in a gaming PC build?
The graphics card is often the most important component for gaming performance, especially at higher resolutions. However, the CPU, memory, storage, and cooling system also contribute to the overall experience.
4. Can beginners build their own gaming PC?
Yes. Beginners can build a gaming PC by following component manuals, checking compatibility, and working carefully. If you are uncomfortable handling computer hardware, ask an experienced person or technician for help.
5. Is an SSD necessary for a gaming PC?
An SSD is strongly recommended because it improves operating system responsiveness and reduces loading times in many games. A traditional HDD can still be useful for storing large files and recordings.
Conclusion
A successful gaming PC build starts with a clear budget, compatible components, and a good understanding of your gaming needs. Choosing the right processor, graphics card, RAM, storage, motherboard, power supply, and cooling system helps create a computer that delivers reliable performance.
You do not need to buy the most expensive hardware to enjoy PC gaming. Focus on balanced components, check compatibility before purchasing, and leave room for future upgrades when possible.
With careful planning and proper assembly, you can build a gaming computer that suits your favorite games, fits your budget, and provides an enjoyable gaming experience for years to come.