
Building your own computer can seem difficult when you are doing it for the first time. However, the process becomes much easier when you understand the main components and follow the correct steps.
If you want to learn how to build a PC, this guide will help you choose the right parts, assemble your computer, connect the cables, and install an operating system. Whether you need a PC for gaming, office work, studying, video editing, or everyday use, you can use these steps to get started.
What Do You Need to Build a PC?
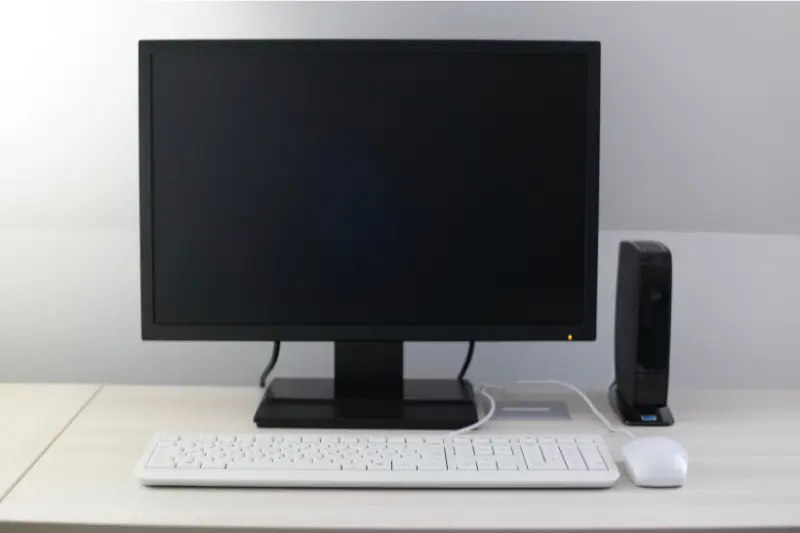
Before assembling your computer, you need to collect all the necessary components. Each part has a specific job, and all components must be compatible with one another.
Here are the main parts you need:
1. Central Processing Unit (CPU)
The CPU is the main processor of your computer. It handles instructions and performs calculations that allow programs to run.
When choosing a CPU, consider what you plan to do with your PC. Everyday tasks may not require an expensive processor, while gaming, programming, and video editing may benefit from a more powerful option.
2. Motherboard
The motherboard connects the CPU, RAM, storage, graphics card, and other components. It also determines which processors and memory types your computer can support.
Check the motherboard’s CPU socket, supported RAM generation, case size, and available storage connections before purchasing it.
3. Random Access Memory (RAM)
RAM temporarily stores the data your computer needs while running applications. Having enough RAM helps your PC handle multiple tasks smoothly.
For many modern desktop computers, 16GB is a reasonable starting point. Users who work with demanding applications or large projects may benefit from 32GB or more.
Make sure the RAM matches the type supported by your motherboard.
4. Storage Drive
Your computer needs storage for the operating system, applications, games, and personal files.
You can choose between these common options:
- SSD: Provides fast startup times and quick application loading.
- NVMe SSD: A type of SSD that connects through an M.2 slot and can offer high transfer speeds.
- HDD: Offers large storage capacity, often at a lower cost per gigabyte, but is generally slower than an SSD.
An SSD is a good choice for most new PC builds.
5. Power Supply Unit (PSU)
The power supply delivers electricity to all your computer components. Choosing a reliable unit with sufficient wattage is important for safe and stable operation.
Calculate the power needs of your CPU, graphics card, and other components before purchasing a PSU. Also, consider future upgrades and choose a unit with the correct power connectors.
6. Computer Case
The case holds your computer’s internal components and protects them from accidental contact.
Choose a case that supports your motherboard size and has enough room for your graphics card, CPU cooler, power supply, and fans. Good airflow also helps prevent overheating.
7. Graphics Processing Unit (GPU)
The GPU processes images, videos, and other visual information. It is especially important for gaming, 3D design, and graphics-intensive applications.
Some processors include integrated graphics, which can handle everyday tasks without a separate graphics card. If you want to play demanding games or perform professional graphics work, a dedicated GPU may be necessary.
You may also like it:
PC Build Guide: Parts, Tools, and Step-by-Step Setup
Gaming PC Build: Complete Guide for Beginners
Budget PC Build: Best Affordable Parts and Guide
8. CPU Cooler
The CPU produces heat while working, so it needs a cooling solution. Depending on your processor and performance requirements, you may use an air cooler or a liquid cooler.
Check the cooler’s compatibility with your CPU socket and case before buying it.
9. Additional Items
You may also need:
- A Phillips-head screwdriver
- A monitor
- A keyboard and mouse
- An operating system
- A USB flash drive for installation
- Cable ties for cable management
- Case fans, if required
Step 1: Choose Your Budget and PC Requirements
The first step is to decide why you want to build a computer. Your intended use will determine which components deserve the most attention.
For example, an office PC can focus on reliable everyday performance, while a gaming PC may need a stronger graphics card. A video-editing computer may benefit from a powerful CPU, additional RAM, and plenty of fast storage.
Set a budget before shopping. Include the monitor, keyboard, mouse, operating system, and any other items you need.
Avoid spending your entire budget on one expensive component while choosing weak or unreliable parts for everything else.
Step 2: Check Component Compatibility
Before purchasing anything, confirm that all your selected components work together.
Use this checklist:
- The CPU must match the motherboard’s socket and supported processor list.
- The motherboard must support your chosen RAM generation.
- The case must fit the motherboard and graphics card.
- The CPU cooler must support the processor socket and fit inside the case.
- The power supply must provide enough wattage and the required connectors.
- The motherboard must have a suitable slot for your storage drive.
- The motherboard BIOS must support the selected CPU.
A compatible parts list can save you money and prevent problems during assembly.
Step 3: Prepare Your Workspace
Choose a clean, well-lit, flat workspace with enough room for your components. A hard, non-carpeted surface is preferable to reduce the risk of static electricity damage.
Before you start:
- Turn off and unplug any equipment you will be working on.
- Gather your screwdriver and component manuals.
- Handle circuit boards by their edges.
- Keep drinks and liquids away from your workspace.
- Use an anti-static wrist strap if available, following its instructions.
Never open the power supply itself. It can contain dangerous electrical components even when unplugged.
Step 4: Install the CPU
Place the motherboard on its box or another clean, non-conductive surface.
Locate the CPU socket and open its retention mechanism according to the motherboard manual. Find the small alignment mark on the processor and match it with the mark on the socket.
Carefully place the CPU into the socket without forcing it. Secure the retention mechanism as instructed.
Important: Do not touch the delicate socket contacts or force the CPU into position. If it does not sit correctly, stop and check the alignment.
Step 5: Install the RAM
Find the RAM slots on the motherboard. Open the slot clips if your board uses them, then align the notch on each memory stick with the matching notch in its slot.
Press the module down evenly until it is fully seated and the retention clips lock into place.
If you are installing two RAM sticks, consult the motherboard manual for the recommended slots. Many boards recommend the second and fourth slots, but the correct arrangement depends on the model.
Check that both modules are securely installed before moving forward.
Step 6: Install the SSD
If you are using an M.2 SSD, installing it before placing the motherboard inside the case can make the process easier.
Locate a compatible M.2 slot and remove its heatsink or retention screw if necessary. Insert the SSD at the recommended angle, lower it into place, and secure it according to the motherboard instructions.
Some motherboards have multiple M.2 slots with different capabilities. Check the manual to select the appropriate slot.
If you are using a SATA SSD or hard drive, you can install it in the case’s designated drive bay later.
Step 7: Install the CPU Cooler
Follow the cooler manufacturer’s instructions to attach the cooling system.
Some coolers include thermal paste already applied. If yours does not, apply the recommended amount of compatible thermal paste to the CPU’s heat spreader.
Secure the cooler evenly and connect its fan or pump cable to the correct motherboard header, usually labelled CPU_FAN or the appropriate pump header.
Do not forget to remove any protective film covering the cooler’s contact surface. Forgetting this step can cause overheating.
Step 8: Prepare the PC Case
Remove the side panels from the case and identify the motherboard mounting points.
Check that the motherboard standoffs match your board’s mounting holes. Incorrectly placed standoffs can cause electrical shorts.
Install the rear I/O shield if your motherboard has a separate one. Some modern motherboards have an integrated shield.
You can also install additional case fans at this stage. Follow the case’s airflow design and make sure the fans are connected properly.
Step 9: Install the Motherboard
Carefully lower the motherboard into the case, aligning its mounting holes with the standoffs and its rear ports with the I/O opening.
Use the appropriate screws to secure the motherboard. Tighten them enough to hold the board firmly, but do not overtighten them.
Make sure no loose screws or other metal objects remain underneath the motherboard.
Once the board is secured, you can begin connecting the power cables and other components.
Step 10: Install the Power Supply
Place the power supply in its designated compartment and secure it with the correct screws.
If your case has a ventilated PSU area, position the fan according to the case design and available airflow.
Route the necessary cables toward the motherboard and other components. Depending on your hardware, these may include:
- The main 24-pin motherboard power cable
- The CPU power cable
- Graphics card power cables
- SATA power cables for compatible drives and accessories
If you have a modular power supply, use only cables approved for that exact PSU model. Modular cables are not universally interchangeable, even when their connectors appear similar.
Step 11: Install the Graphics Card
If your build includes a dedicated graphics card, locate the appropriate PCIe x16 slot on the motherboard.
Remove the necessary expansion-slot covers from the case. Carefully insert the graphics card into the slot until its retention clip engages.
Secure the card to the case with screws and connect the required power cables from the power supply.
Large graphics cards may need additional support to prevent sagging. If your processor uses integrated graphics and you do not need a dedicated GPU, you can skip this step.
Step 12: Connect All Remaining Cables
Proper cable connections are essential for a successful build.
Connect the front-panel power switch, reset switch, status lights, front USB ports, and audio cables according to the motherboard manual.
Also connect:
- CPU and case fan cables
- SATA data cables, if needed
- RGB or lighting cables, if used
- Any additional power connections required by your hardware
Keep cables away from fans and avoid blocking important airflow paths. Cable ties can help keep everything organized.
Before proceeding, check that each cable is connected to the correct header or socket.
Step 13: Check Everything Before Turning On the PC
Before connecting the power cable, inspect your build carefully.
Confirm that:
- The CPU cooler is securely mounted.
- RAM and the graphics card are fully seated.
- The motherboard and CPU power cables are connected.
- All required GPU power cables are attached.
- Storage drives and fans are connected.
- No loose screws remain inside the case.
- No cables are touching fan blades.
Connect the monitor, keyboard, and mouse. If you have a dedicated graphics card, connect the monitor to the graphics card rather than the motherboard’s video output.
Then connect the power cable and switch on the power supply.
Step 14: Start the PC and Enter the BIOS
Press the computer’s power button. The first startup may take longer than usual, particularly on a system that is training its memory.
If the computer starts successfully, enter the BIOS or UEFI setup using the key specified by your motherboard manufacturer. Common keys include Delete and F2.
Check that the system recognizes your CPU, RAM, and storage drive. You can also review the CPU temperature and confirm that the cooling fans are working.
If the PC does not display anything, turn it off and check the power connections, RAM seating, graphics card, and monitor connection.
Do not repeatedly restart the system without investigating an obvious problem.
Step 15: Install the Operating System
After confirming that the hardware works, install an operating system such as Windows or a suitable Linux distribution.
You will generally need a USB flash drive containing the official installation files. Create the installation media using the operating system provider’s instructions.
Insert the USB drive, start the PC, and select the appropriate boot device. Follow the on-screen installation instructions.
Before installing, make sure you select the correct storage drive and understand whether the process will erase existing data.
Use a valid licence when required by your chosen operating system.
Step 16: Install Drivers and Test Performance
Once the operating system is installed, connect to the internet and install the required updates and drivers.
Visit the official websites of your motherboard, graphics card, and other hardware manufacturers when necessary. Avoid downloading drivers from unknown websites.
After updating the system, test your computer by opening applications and checking that the hardware works as expected.
For gaming or demanding work, monitor CPU and GPU temperatures under load. If the computer overheats, crashes, or makes unusual noises, investigate the issue before using it for long sessions.
You can also enable a supported memory profile, such as XMP or EXPO, in the BIOS if you want to use the rated memory speed. Follow the motherboard and memory manufacturer’s guidance, since stability can vary by system.
Common Mistakes to Avoid When Building a PC
Even a carefully planned build can run into problems. These mistakes are worth avoiding:
Buying Incompatible Parts
A powerful processor is not useful if it does not work with your motherboard. Always verify compatibility before purchasing components.
Choosing a Poor-Quality Power Supply
Do not judge a PSU by wattage alone. Consider its quality, protection features, connectors, warranty, and suitability for your hardware.
Forgetting the CPU Power Cable
The motherboard’s main power connector and CPU power connector serve different purposes. Both must be connected where required.
Installing RAM Incorrectly
A RAM module that is not fully seated may prevent the computer from starting. Check the recommended slots and make sure the modules are locked in place.
Forgetting Thermal Paste or Protective Film
An incorrectly installed cooler can cause high temperatures. Follow the cooling manufacturer’s instructions and ensure that no protective film remains on the contact surface.
Ignoring Airflow
Poor airflow can increase temperatures and fan noise. Use a sensible fan layout and keep cables away from fan blades.
Rushing the Assembly
Take your time with each component. If a part does not fit easily, stop and check its alignment instead of forcing it.
How Much Does It Cost to Build a PC?
The cost depends on your country, component availability, performance goals, and whether you purchase new or used parts.
An entry-level computer for browsing, studying, and office tasks will generally cost less than a gaming PC with a dedicated graphics card. A high-performance workstation for video editing, 3D rendering, or other demanding work may cost considerably more.
When planning your budget, include the following:
- CPU and motherboard
- RAM and storage
- Power supply and case
- CPU cooler and case fans
- Graphics card, if required
- Monitor and peripherals
- Operating system and any necessary accessories
Compare the total cost of compatible parts rather than choosing components based only on their individual prices.
Is Building Your Own PC Worth It?
Building your own PC can be worthwhile if you want control over the hardware, need specific performance levels, or enjoy learning about computers.
It also makes future upgrades easier because you become familiar with the internal components. You can replace individual parts instead of purchasing an entirely new computer when your needs change.
However, a prebuilt PC may be more convenient if you do not want to assemble the hardware, troubleshoot startup issues, or manage component warranties separately.
The right choice depends on your budget, technical confidence, and how much time you want to spend on the process.
Frequently Asked Questions
1. Is it difficult to build a PC for the first time?
Building a PC can be manageable for beginners who follow component manuals and work carefully. Understanding compatibility and handling the hardware properly are the most important starting points.
2. How long does it take to build a PC?
A first-time builder may need several hours to assemble, test, and set up the computer. The time depends on the components, case design, cable management, and any troubleshooting required.
3. Can I build a PC without a graphics card?
Yes. You can build a PC without a dedicated graphics card if your processor has integrated graphics and your motherboard provides a compatible display output. This setup can work well for everyday tasks, although it may not suit demanding gaming.
4. How much RAM do I need for a new PC?
For many modern computers, 16GB is a useful starting point. If you regularly use demanding software, edit large videos, or run many applications simultaneously, 32GB or more may be beneficial.
5. What should I do if my new PC does not turn on?
Check the wall power connection, PSU switch, motherboard power cables, CPU power cable, RAM seating, and front-panel power-switch connection. If the computer turns on but shows no display, check the monitor input and graphics connection as well.
Consult your motherboard manual for troubleshooting indicators and diagnostic steps.
Final Thoughts
Learning how to build a PC is easier when you divide the process into smaller steps. Start by choosing compatible components, prepare a safe workspace, install the hardware carefully, and check every connection before powering on the computer.
Once your PC starts successfully, install the operating system, update the necessary drivers, and test the system. With careful planning and patience, you can build a computer that suits your needs and gives you room to upgrade in the future.