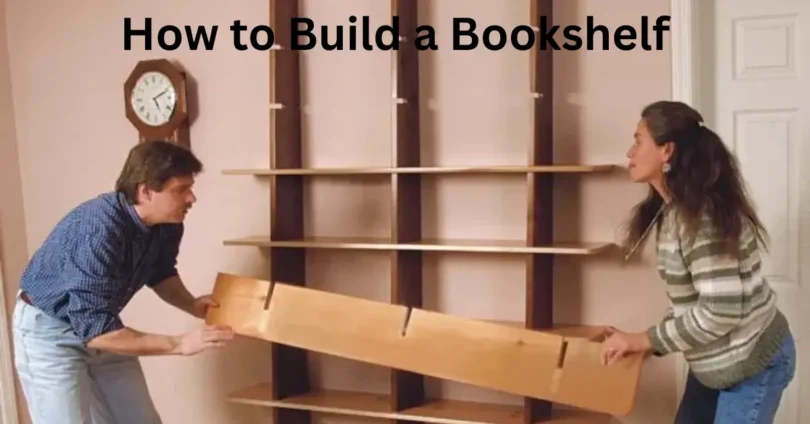

Building your own bookshelf is a great way to organize your books, decorate your home, and save money. Whether you need a small shelf for your bedroom, a bookcase for your living room, or a large storage unit for your home office, you can create one with basic tools and materials.
The good news is that you do not need professional woodworking skills to get started. With careful measurements, a suitable design, and a little patience, you can build a bookshelf that fits your space and storage needs.
In this guide, you will learn how to build a bookshelf step by step, which materials to choose, how much it may cost, and how to make your finished shelf safe and attractive.
Why Build Your Own Bookshelf?

A DIY bookshelf offers several advantages over buying a ready-made bookcase.
- Save money: Building a simple bookshelf can cost less than purchasing a comparable finished piece of furniture.
- Choose your own size: You can adjust the height, width, and depth to fit your room.
- Customize the design: Select your preferred wood, paint color, finish, and shelf arrangement.
- Improve organization: Keep books, magazines, plants, and decorative items in one convenient place.
- Develop a useful skill: A bookshelf is a practical project for learning basic woodworking techniques.
If you enjoy DIY home improvement, this project is an excellent starting point.
What Materials Do You Need to Build a Bookshelf?
Before learning how to build a bookshelf, gather the necessary materials and tools. Having everything ready will make the process easier and help you avoid unnecessary interruptions.
Materials
For a basic, freestanding bookshelf, you will need:
- Two wooden boards for the sides
- Three or four boards for the shelves
- One board for the top
- One board for the bottom
- A thin plywood panel for the back, if desired
- Wood screws
- Wood glue
- Sandpaper
- Wood stain, paint, or clear protective finish
- Wall anchors or brackets for securing the bookshelf
Plywood, pine, and other suitable furniture-grade wood are common choices. Plywood can provide good stability when properly supported, while pine is easy to cut and work with.
Avoid using damaged, damp, or badly warped boards.
Tools
You may need the following tools:
- Measuring tape
- Pencil
- Carpenter’s square
- Circular saw or handsaw
- Power drill and suitable drill bits
- Screwdriver
- Level
- Clamps
- Safety glasses
- Dust mask
- Paintbrush or roller
If you do not have a saw, ask a local timber supplier or hardware store whether they can cut the boards to your measurements.
Step 1: Choose Your Bookshelf Design
The first step in learning how to build a bookshelf is deciding what type of bookcase you need.
Your design should depend on the available space, the number of books you own, and the overall appearance of your room.
Freestanding Bookshelf
A freestanding bookshelf is a practical option for bedrooms, living rooms, and home offices. You can build it in different sizes and move it when necessary, although a tall bookcase should be secured to the wall.
Wall-Mounted Bookshelf
A wall-mounted bookshelf saves floor space and works well in small rooms. It requires suitable wall fixings and secure installation into appropriate structural supports.
Corner Bookshelf
A corner bookshelf uses an often-overlooked area of a room. It is useful for displaying smaller book collections, decorations, or plants.
Built-In Bookshelf
A built-in bookshelf fits into a wall recess or spans a specific area of a room. It can create a clean, customized appearance, but it generally requires more planning and precise measurements.
For beginners, a simple rectangular freestanding bookshelf is usually the easiest design to build.
Step 2: Measure Your Space
Before cutting any wood, measure the area where you plan to place your bookshelf.
Measure the available height, width, and depth. Also, check nearby doors, windows, furniture, electrical outlets, and walking paths.
For example, you could build a small bookshelf with these approximate dimensions:
| Part | Suggested measurement |
| Height | 120 cm |
| Width | 60 cm |
| Depth | 25 cm |
| Number of shelves | 4, including top and bottom |
These dimensions are only an example. Adjust them to suit your room and the books you intend to store.
Standard paperbacks may fit on shallower shelves, while large textbooks and reference books may need more depth.
Helpful tip: Measure your largest book before deciding the shelf spacing. Leave enough vertical clearance to remove books comfortably.
Step 3: Select the Right Wood
Choosing suitable wood is important for building a strong and long-lasting bookshelf.
Plywood
Plywood is made from layers of wood veneer bonded together. Good-quality plywood is useful for bookcases because it is available in large panels and can provide good strength when correctly designed and supported.
Pine
Pine is a popular choice for beginner woodworking projects. It is relatively easy to cut, drill, sand, and paint.
MDF
Medium-density fiberboard, or MDF, provides a smooth surface for painting. However, it is heavy, can swell when exposed to moisture, and needs appropriate support to prevent shelves from sagging.
Solid Hardwood
Hardwoods such as oak are durable and attractive, but they can cost more and may require additional woodworking experience.
For an affordable first project, suitable plywood or pine is often a sensible choice. Select the material thickness according to the shelf span, expected weight, and support design rather than choosing by appearance alone.
Step 4: Cut the Boards to Size
Once you have selected your design and materials, mark the measurements on the wood.
For the example bookshelf measuring 120 cm high, 60 cm wide, and 25 cm deep, a basic cutting list might include:
- Two side panels measuring 120 × 25 cm
- Three horizontal shelf boards measuring approximately 57 × 25 cm
- One top board measuring approximately 57 × 25 cm
- One bottom board measuring approximately 57 × 25 cm
This cutting list assumes that the top, bottom, and shelves fit between the side panels. The exact dimensions depend on the board thickness and how you plan to assemble the bookcase.
A back panel can be added after the main frame is assembled. Measure it against the finished frame before cutting.
Mark every piece clearly and double-check your measurements. Cut slowly and follow the saw manufacturer’s safety instructions.
Safety reminder: Wear eye protection, secure the wood before cutting, and keep your hands away from the blade. If you are inexperienced with power tools, ask a skilled person for help.
Step 5: Sand the Wood
Sanding helps create smooth surfaces and removes rough edges that could cause splinters.
Start with medium-grit sandpaper, such as 120 grit, and finish with finer sandpaper, such as 180 or 220 grit, when appropriate for your chosen finish.
Pay attention to:
- The front edges of every shelf
- The outer surfaces of the side panels
- The corners of the top and bottom boards
- Any rough areas around screw holes
Remove sanding dust with a suitable cloth or vacuum before applying paint or stain.
For a painted bookshelf, a compatible primer can help produce a smoother, more durable finish.
Step 6: Assemble the Bookshelf Frame
Now it is time to put the main structure together.
Place the two side panels on a flat, level surface. Position the top and bottom boards between them according to your design.
Follow these steps:
- Mark the locations where the top and bottom boards will connect to the side panels.
- Check that the pieces line up correctly.
- Drill pilot holes to reduce the risk of splitting the wood.
- Apply wood glue to the appropriate joining surfaces if recommended for your materials and joint design.
- Secure the boards using suitable wood screws.
- Check the corners with a carpenter’s square.
- Confirm that the frame is level and square before the glue sets.
Use screws of the correct length so that they do not protrude through the finished surfaces. Do not overtighten them, especially near board edges.
The frame should sit evenly without twisting or rocking.
You may also like it:
PC Build Guide: Parts, Tools, and Step-by-Step Setup
Gaming PC Build: Complete Guide for Beginners
Budget PC Build: Best Affordable Parts and Guide
Step 7: Install the Shelves
After assembling the frame, decide where each shelf should go.
Use a measuring tape and pencil to mark matching shelf positions on both side panels. Keeping these marks aligned helps prevent tilted shelves.
You can attach shelves using several methods:
- Fixed shelves: Screwed or joined directly to the side panels for a permanent arrangement.
- Shelf pins: Allow shelves to be moved to different heights when installed in a suitable hole pattern.
- Cleats or support strips: Provide additional support underneath the shelves.
For a simple beginner project, fixed shelves can be easier to install.
Place each shelf at its marked position, check that it is level, and secure it using an appropriate fastening method. Follow the manufacturer’s instructions for any specialized brackets or shelf supports.
Do not rely on a few small screws alone to support heavy books across a long span. Shelf thickness, support placement, material quality, and the total load all affect strength.
Step 8: Add a Back Panel
Adding a back panel is optional, but it can make your bookshelf more stable and improve its appearance.
A thin plywood panel attached securely to the rear of the frame can help prevent the bookcase from shifting out of square. It can also stop small items from falling behind the shelves.
Measure the assembled frame and cut the panel to fit. Attach it using suitable fasteners at appropriate intervals, following the panel and frame materials’ requirements.
Make sure the rear panel does not interfere with wall anchors or other safety hardware.
A back panel adds useful rigidity, but it does not replace proper wall anchoring for a tall bookshelf.
Step 9: Paint or Finish the Bookshelf
Once the structure is assembled, you can customize its appearance.
Painting
Paint is a good option if you want your bookshelf to match your existing furniture. Apply a suitable primer when needed, then use a compatible furniture paint.
Allow each coat to dry according to the manufacturer’s directions.
Wood Stain
Wood stain highlights the grain of natural wood. Test the stain on a spare piece first because different boards can absorb color differently.
Clear Protective Finish
A suitable clear finish can protect the surface from everyday marks and make cleaning easier.
Before finishing, check that the wood is clean and dry. Work in a well-ventilated area, follow the product’s safety instructions, and allow the finish to cure fully before loading the bookshelf.
Step 10: Secure the Bookshelf and Test It
The final step is checking that your new bookshelf is safe and ready to use.
Place the bookshelf on a level floor. Check that all joints are secure and that no screws or sharp edges are exposed.
Most importantly, secure tall or top-heavy bookshelves to the wall using suitable anti-tip hardware. Choose fixings appropriate for the wall construction, such as the relevant studs, masonry, or other suitable structural support. Do not assume that ordinary drywall anchors are sufficient for every installation.
After securing the unit:
- Check that the bookshelf does not wobble.
- Place a few books on each shelf.
- Distribute the weight evenly.
- Look for signs of bending or sagging.
- Add more books gradually, staying within the design’s safe load capacity.
Keep heavier books on lower shelves to reduce the risk of tipping. Do not climb on the bookshelf or use it as a ladder.
Your DIY bookshelf is now ready to organize your collection.
How Much Does It Cost to Build a Bookshelf?
The cost of building a bookshelf depends on the wood, dimensions, hardware, finish, and tools you already own.
| Expense | What affects the cost |
| Wood or plywood | Material type, thickness, and quantity |
| Screws and brackets | Number and quality of fasteners |
| Wood glue | Product type and container size |
| Sandpaper | Number of grits and sheets needed |
| Paint or stain | Brand, finish, and number of coats |
| Tools | Whether you already own them or need to purchase them |
A basic design using affordable materials can be economical, especially if you already have the necessary tools. A large hardwood bookcase or custom built-in design will generally cost more.
To estimate your budget, calculate the total cost of the required boards, hardware, finish, and any tool rental or cutting services. Check local prices before purchasing materials.
Common Mistakes to Avoid When Building a Bookshelf
Even a simple DIY project can be frustrating if you overlook a few important details.
1. Skipping Measurements
Incorrect measurements can result in uneven shelves or a bookcase that does not fit its intended space. Measure twice and check the cutting list before making cuts.
2. Using Weak Materials
Very thin boards or unsuitable materials may bend under the weight of books. Choose material and support spacing based on the intended load.
3. Forgetting Pilot Holes
Driving screws directly into some types of wood, particularly near edges, can cause splitting. Drill appropriately sized pilot holes when needed.
4. Installing Uneven Shelves
If shelf positions are different on the two sides, the finished bookcase may look crooked. Measure from the same reference point and use a level.
5. Ignoring Wall Safety
A tall bookshelf can tip if a child climbs it or heavy items shift toward the front. Use appropriate anti-tip hardware and keep heavy items low.
6. Rushing the Finish
Painting or loading the bookshelf before the finish has dried and cured can damage the surface. Follow the product instructions and allow sufficient drying time.
Tips for Making Your Bookshelf Look Better
You can make a basic bookshelf look more polished without making the project complicated.
- Match your room: Choose paint or stain that complements your furniture and wall color.
- Add decorative trim: Simple trim around the top can create a more finished appearance.
- Use matching storage boxes: Boxes can organize papers, cables, and small accessories.
- Mix books with decorations: Leave some space for framed photos, small plants, or decorative objects.
- Keep shelves organized: Group books by size, subject, or color according to your preference.
- Use suitable lighting: A nearby lamp can make a reading corner feel more welcoming.
Avoid placing heavy decorations near the front edge or overloading shelves just to achieve a particular look.
Frequently Asked Questions
Is it difficult to build a bookshelf for beginners?
No. A simple rectangular bookshelf is a manageable project for many beginners. Careful measuring, basic cutting, drilling, and assembly are the main skills required. You can simplify the process by having the wood cut to size by a supplier.
What is the best wood for a DIY bookshelf?
Plywood and pine are common choices for beginners. Plywood offers useful panel sizes and strength when properly supported, while pine is easy to work with. The best choice depends on your budget, design, and expected load.
How deep should a bookshelf be?
A depth of approximately 20 to 30 cm works for many ordinary books, but larger textbooks and oversized books may require more room. Measure your collection before finalizing the design.
How many shelves should a bookshelf have?
The number depends on the bookcase’s height and the size of your books. A small bookshelf might have two or three storage levels, while a taller bookcase can have four or more. Allow enough clearance to remove books comfortably.
Can I build a bookshelf without power tools?
Yes. You can use hand tools for many basic tasks, although cutting and drilling may take longer. Another practical option is to purchase pre-cut boards and assemble them with suitable hand tools and fasteners.
Final Thoughts
Learning how to build a bookshelf is a practical way to improve your home while developing useful DIY skills. With the right materials, accurate measurements, and a straightforward design, you can create a bookcase that suits your space and personal style.
Start by choosing a suitable location, measuring your books, and preparing a clear cutting list. Assemble the frame carefully, install strong and level shelves, and finish the wood to match your room. Most importantly, select materials that can support the intended weight and secure the finished bookshelf against tipping.
Whether you need a compact shelf for a small bedroom or a larger bookcase for your home office, a well-planned DIY bookshelf can provide useful storage for years to come.