
Building your own PC can be an exciting and rewarding experience. Whether you need a computer for gaming, office work, video editing, programming, or everyday use, a custom PC build allows you to choose the components that match your needs and budget.
You do not need to be a computer expert to get started. With the right parts, basic knowledge, and a little patience, you can assemble a computer that delivers good performance and can be upgraded in the future.
In this guide, you will learn what a PC build is, which components you need, how to choose the right hardware, and how to assemble your computer step by step.
What Is a PC Build?
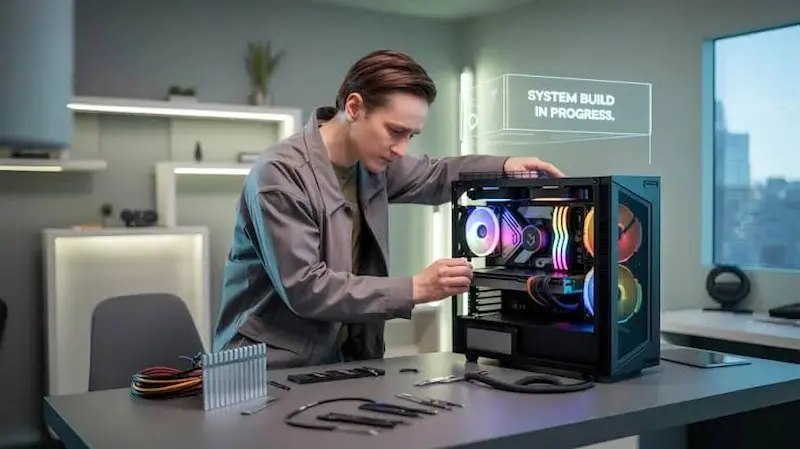
A PC build is the process of selecting and assembling computer components to create a working desktop computer. Instead of purchasing a complete system from a manufacturer, you choose individual parts based on your performance needs and budget.
For example, a gaming PC may need a powerful graphics card, while an office computer may work perfectly with a basic processor and integrated graphics.
Building your own computer gives you more control over its performance, appearance, storage capacity, cooling, and future upgrades.
Why Should You Build Your Own PC?
There are several reasons why people choose to build their own computers instead of buying prebuilt systems.
1. Better Control Over Your Budget
When you build a computer yourself, you can decide how much money to spend on each component. You can invest more in important parts, such as the processor or graphics card, and save money on features you do not need.
2. Choose Components for Your Needs
A custom computer can be designed for gaming, graphic design, video editing, programming, or general office work. You can select hardware that suits your specific tasks rather than paying for unnecessary features.
3. Easier Future Upgrades
A well-planned PC build can make future upgrades easier. You may be able to add more RAM, install additional storage, or replace the graphics card when your needs change.
However, upgrades depend on your motherboard, power supply, case dimensions, and other compatibility requirements.
4. Learn More About Computers
Building a computer helps you understand how hardware components work together. This knowledge can also make it easier to troubleshoot problems and maintain your system.
Essential Components for a PC Build
Before purchasing anything, learn about the main components required to build a desktop computer.
1. Processor (CPU)
The central processing unit, or CPU, handles instructions and calculations. It plays an important role in overall system performance.
Popular processor families include AMD Ryzen and Intel Core.
When choosing a CPU, consider your budget, intended use, core count, performance requirements, and compatibility with your motherboard.
2. Motherboard
The motherboard connects the processor, memory, storage, graphics card, and other components.
You must choose a motherboard that supports your selected CPU socket and memory type. Also check its expansion slots, storage connections, networking features, and physical size.
3. Random Access Memory (RAM)
RAM temporarily stores information that your computer needs while running applications.
For many modern desktop users, 16GB of RAM is a practical starting point. Gaming, professional editing, and demanding workloads may benefit from 32GB or more.
Make sure the RAM type and supported speeds are compatible with your motherboard.
4. Storage Drive
Storage holds your operating system, applications, games, and personal files.
An SSD is generally a good choice because it provides faster loading times than a traditional hard disk drive. An NVMe SSD can offer particularly fast performance when supported by the motherboard.
A 1TB SSD is a useful starting point for many users, although your storage needs will depend on the size of your applications and files.
5. Graphics Card (GPU)
The graphics processing unit handles visual tasks, including gaming, 3D rendering, and certain creative applications.
A dedicated graphics card is useful for demanding games and professional graphics workloads. However, some processors include integrated graphics that are sufficient for office work, browsing, video playback, and other everyday activities.
Choose a GPU based on your monitor resolution, preferred games, software requirements, budget, and available power supply capacity.
6. Power Supply Unit (PSU)
The power supply delivers electricity to your computer components.
Choose a reliable PSU with enough wattage and the correct power connectors for your system. Check the recommendations for your graphics card and processor before making a purchase.
Avoid choosing a power supply based on wattage alone. Build quality, protection features, efficiency, and warranty also matter.
7. PC Case
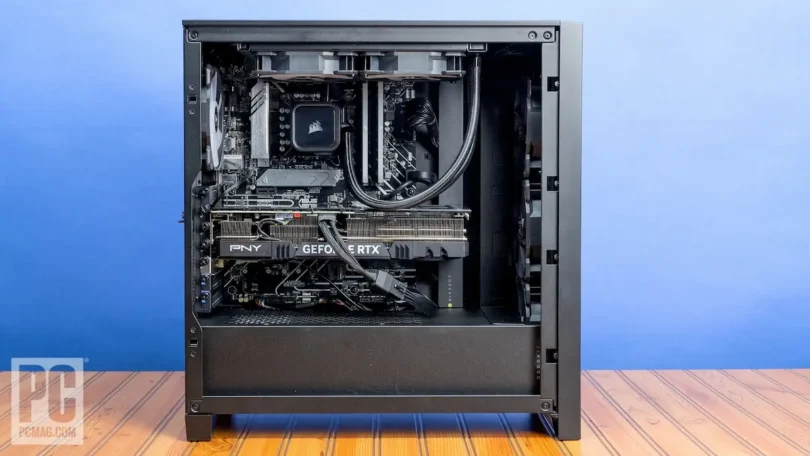
The case holds and protects your components. It also affects airflow, cooling, cable management, and the overall appearance of your computer.
Before buying a case, confirm that it supports your motherboard size, graphics card length, CPU cooler height, and power supply dimensions.
A case with good airflow can help maintain suitable temperatures during demanding tasks.
8. CPU Cooler
The CPU cooler removes heat from the processor.
Some processors include a stock cooler, while others require a separate cooling solution. Depending on your CPU and workload, you may choose an air cooler or a liquid cooler.
Make sure the cooler supports your processor socket and fits inside your case.
9. Operating System and Peripherals
After assembling your PC, you will need an operating system, such as Windows or a suitable Linux distribution.
You may also need a monitor, keyboard, mouse, and other accessories. These items should be included in your budget if you do not already own them.
How to Choose the Right PC Build for Your Budget
Your ideal PC build depends on what you want to do with your computer.
Budget PC Build
A budget PC is suitable for web browsing, school assignments, office applications, online meetings, and basic entertainment.
A suitable configuration may include:
- A budget processor with integrated graphics
- A compatible motherboard
- 16GB of RAM
- A 500GB or 1TB SSD
- A reliable power supply
- An affordable case with adequate airflow
This type of system can provide a good everyday computing experience without requiring an expensive dedicated graphics card.
Gaming PC Build
A gaming PC needs hardware that can handle your preferred games at your target resolution and frame rate.
A balanced configuration may include:
- A modern midrange processor
- A compatible motherboard
- 16GB or 32GB of RAM
- A dedicated graphics card
- A 1TB SSD or larger
- A quality power supply
- A case with good airflow
The graphics card is particularly important for gaming performance. However, the processor, memory, cooling, and monitor also influence the overall experience.
PC Build for Video Editing
Video editing can require significant processing power, memory, and storage.
Consider a configuration with:
- A modern multi-core processor
- 32GB of RAM or more, depending on the workload
- A fast SSD for applications and active projects
- Additional storage for video files
- A graphics card supported by your editing software
- A suitable cooling solution
For professional work, check the recommended hardware requirements of the software you plan to use.
PC Build for Office Work
An office computer does not usually require expensive gaming hardware.
A practical configuration may include an entry-level or midrange processor, 8GB to 16GB of RAM, an SSD, and a reliable power supply. Integrated graphics are often enough for typical office tasks.
Choosing suitable hardware instead of the most expensive components can help reduce costs.
Step-by-Step Guide to Building a PC
Once you have purchased compatible components, you can begin assembling your computer.
Step 1: Prepare Your Workspace
Choose a clean, well-lit work area with enough space for your components.
Keep a Phillips-head screwdriver nearby and organize the screws and accessories. Work on a stable surface, avoid carpet where possible, and use appropriate precautions against static electricity. Before handling components, disconnect all power sources and ground yourself using an appropriate anti-static method.
Step 2: Install the CPU
Start by placing the motherboard on its box or another clean, nonconductive surface.
Open the CPU socket according to the motherboard instructions. Align the processor with the socket markers and gently place it into position. Do not force it, as the pins or contacts can be damaged.
Secure the processor using the socket’s locking mechanism.
Step 3: Install the RAM
Locate the memory slots on the motherboard. Check the motherboard manual to identify the recommended slots for your memory configuration.
Open the slot clips if required, align the notch on each RAM module, and press evenly until the module clicks into place.
Make sure the memory is fully seated before moving on.
Step 4: Install the SSD
If you are using an M.2 SSD, locate the appropriate M.2 slot on the motherboard.
Remove the mounting screw or heatsink, insert the SSD at the recommended angle, and gently lower it into place. Secure it with the mounting screw and reinstall the heatsink if provided.
For a SATA SSD, you can install the drive in the appropriate case mounting area later and connect its data and power cables.
Step 5: Install the CPU Cooler
Follow the cooler manufacturer’s instructions for your specific processor socket.
If the cooler does not have thermal paste pre-applied, apply the recommended amount to the CPU heat spreader. Attach the cooler evenly and tighten the mounting hardware according to the instructions.
Connect the cooler’s fan cable to the motherboard header labeled CPU_FAN or the appropriate header specified in the manual.
Avoid running the computer without the required CPU cooling system installed.
Step 6: Prepare the PC Case
Remove the side panels from your case and locate the motherboard mounting points.
Check that the motherboard standoffs match the size and layout of your board. Incorrectly positioned standoffs can cause an electrical short.
Install the rear I/O shield if your motherboard has a separate one. Some motherboards have an integrated I/O shield, so no separate installation is needed.
Step 7: Install the Motherboard
Carefully lower the motherboard into the case, aligning its rear ports with the I/O opening and its mounting holes with the standoffs.
Secure the board using the appropriate screws. Tighten them until secure without applying excessive force.
Make sure no loose screws or metal objects remain beneath the motherboard.
Step 8: Install the Power Supply
Place the PSU in its designated case compartment, following the case manufacturer’s instructions.
If the case has a bottom ventilation opening and a dust filter, position the PSU fan according to the case’s airflow design and available clearance.
Secure the PSU with the supplied screws.
If you have a modular power supply, connect only the cables required for your build. Use only cables supplied for that exact PSU model because modular cables from different power supplies may not be interchangeable.
Step 9: Install the Graphics Card
If your PC uses a dedicated graphics card, locate the appropriate PCIe x16 slot on the motherboard.
Remove the necessary expansion-slot covers from the case. Open the slot latch, align the graphics card, and press it into place until it is fully seated.
Secure the card to the case using screws. Connect the required PCIe or 12V-2×6 power cables according to the graphics card and power supply instructions.
If your processor uses integrated graphics and you do not need a dedicated GPU, you can skip this step.
Step 10: Connect the Power Cables
Connect the main 24-pin motherboard power cable and the CPU power cable, commonly a 4-pin or 8-pin connector near the processor.
Connect any additional power cables required by your graphics card, storage drives, or other components.
Check that each connector is fully seated and that you are using the correct cable for each connection.
Never force a connector into a socket that does not match its shape.
Step 11: Connect the Case Cables
Connect the small front-panel cables for the power button, reset button, and status lights according to the motherboard manual.
Also connect the front USB ports, audio ports, and case fans to their appropriate headers.
These connectors can be small, so take your time and verify their positions before connecting them.
Step 12: Manage the Cables
Use the cable-routing channels behind the motherboard tray to organize the wires.
Secure loose cables with cable ties or the straps provided with your case. Keep cables away from fans and avoid blocking major airflow paths.
Good cable management improves the appearance of your PC and can make future maintenance easier.
Step 13: Check Everything Before Powering On
Before connecting the computer to electricity, review your installation.
Confirm that:
- The CPU and cooler are installed correctly.
- The RAM and SSD are fully seated.
- The motherboard is securely mounted.
- The 24-pin motherboard and CPU power cables are connected.
- The graphics card is properly installed and powered, if present.
- The CPU cooler and case fans are connected.
- No loose screws or tools remain inside the case.
Reconnect the power cable, connect your monitor, and attach your keyboard and mouse.
Step 14: Turn On Your PC
Switch on the power supply and press the case power button.
The first startup may take longer than usual because the motherboard may need to initialize the memory. Fans may spin up, and the system may restart during this process.
If the computer starts successfully, the monitor should display the manufacturer’s logo or a message indicating that no operating system is installed.
If there is no display, switch off the system and disconnect power before checking component seating and cable connections.
Step 15: Enter the BIOS or UEFI
Press the appropriate key during startup, commonly Delete or F2, to enter the BIOS or UEFI setup.
Check that the processor, memory, and storage drive are detected correctly.
You can also review CPU temperatures and fan speeds. Enable a supported memory profile, such as XMP or EXPO, if desired and if your hardware supports it.
Avoid changing unfamiliar settings. Save your changes and restart when you are ready.
Step 16: Install the Operating System
Create a bootable USB installer for your chosen operating system using another working computer if necessary.
Insert the USB drive, select it as the boot device, and follow the installation instructions.
Choose the correct target drive before installing, as formatting or deleting partitions can erase existing data.
After installation, complete the initial setup and connect to the internet.
Step 17: Install Drivers and Updates
Install the operating system updates and the appropriate drivers for your hardware.
Depending on your configuration, you may need:
- Motherboard chipset drivers
- Graphics card drivers
- Network and Wi-Fi drivers
- Audio drivers
- Storage or other device drivers
Use trusted manufacturer sources and restart the computer when required.
Step 18: Test Your New PC
Once the system is running, check that everything works as expected.
Open the system information tools to verify the detected RAM, processor, storage, and graphics hardware. Check temperatures under normal workloads and confirm that the fans operate correctly.
You can also run appropriate memory diagnostics and stability tests. Monitor temperatures during testing and stop if the system overheats, shuts down unexpectedly, or behaves abnormally.
Common PC Building Mistakes to Avoid
Even a carefully planned build can run into problems. Avoid these common mistakes:
- Ignoring compatibility: Confirm that the CPU, motherboard, RAM, cooler, and case work together.
- Choosing a poor-quality PSU: Select a reliable model with suitable capacity and connectors.
- Forcing components into place: If a part does not fit, check its orientation and compatibility.
- Forgetting CPU power: The motherboard’s main power cable alone may not be enough to start the system.
- Connecting the monitor incorrectly: If you use a dedicated graphics card, connect the monitor to the graphics card’s output rather than the motherboard’s display port, unless you specifically intend to use integrated graphics.
- Ignoring cooling: Make sure the CPU cooler is mounted correctly and case airflow is adequate.
- Buying too little storage: Consider the space needed for your operating system, applications, games, and files.
- Skipping testing: Check temperatures, memory stability, and system performance before relying on the PC for important work.
Final Thoughts
Building a PC becomes much easier when you plan your components carefully and follow each assembly step in order. Start with compatible hardware, install the components patiently, check all connections, and test the system before using it for demanding tasks.
A well-planned PC build can provide reliable performance for gaming, work, education, and creative projects. It can also give you valuable knowledge about computer hardware and make future upgrades easier.
Frequently Asked Questions (FAQs)
1. How much does it cost to build a PC?
The cost of a PC build depends on the components you choose and your intended use. A basic office computer usually costs less than a gaming or video editing PC. Set a budget before purchasing parts and compare compatible options.
2. Is building a PC difficult for beginners?
Building a PC can be manageable for beginners if they follow clear instructions and take their time. Learning about component compatibility and handling hardware carefully can make the process easier.
3. What parts do I need to build a PC?
The main components include a CPU, motherboard, RAM, storage drive, power supply, PC case, and CPU cooler. You may also need a dedicated graphics card, case fans, monitor, keyboard, and mouse.
4. Do I need a graphics card to build a PC?
No, a dedicated graphics card is not required for every computer. A processor with integrated graphics can handle many everyday tasks. However, gaming, 3D rendering, and other graphics-intensive activities may require a dedicated GPU.
5. How long does it take to build a PC?
A first-time PC build may take several hours, depending on your experience and the complexity of the system. Installing the operating system, updating drivers, and testing the computer require additional time.